Zivid 2+
Zivid 2
Software
Get Started
Industries
Get Started
Support
Downloads
Customers
Zivid 2+
Zivid 2
Software
Get Started
Industries
Get Started
Support
Downloads
Customers


Requirements


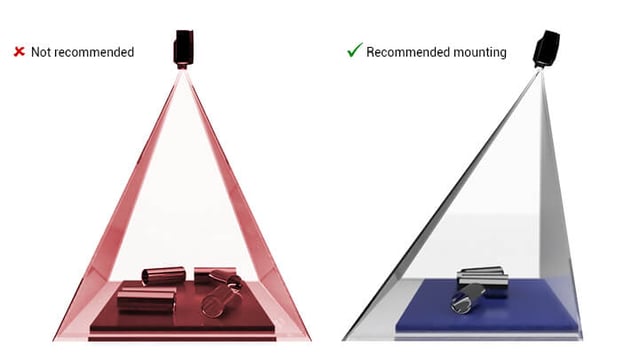
3D cameras use active lighting to detect your target objects. To minimize direct reflections from the background and reduce potential artifacts, it is recommended that you mount your camera at a slight angle to get the best results. You can test different positions in Zivid Studio.


Requirements
3D cameras use active lighting to detect your target objects. To minimize direct reflections from the background and reduce potential artifacts, it is recommended that you mount your camera at a slight angle to get the best results. You can test different positions in Zivid Studio.
