An easy tool designed to help you get started using the Zivid camera
Overview of the Zivid Studio
User Interface
A comprehensive guide
to Zivid Studio.
Learn how to capture images of dark, colored, and shiny objects.
What is Zivid Studio?
Zivid Studio is an application that provides you with a simple graphical user interface (GUI) to explore the functionality of Zivid, our advanced and exceptionally accurate 3D camera.
What to expect with Zivid Studio?
With Zivid Studio you can explore all the available functions of the Zivid camera to correctly develop your application. You can:
A point cloud is a 3D representation of an image. A good point cloud is characterized by dense points and no missing data, yielding a life-like 3D model of the captured scene.
Fig.1.1 The image below displays a screenshot of Zivid Studio in use.
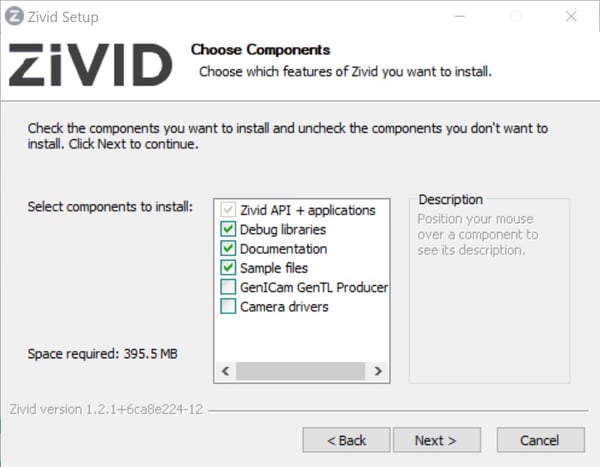
The Zivid Studio toolbar on the top of the interface comprises of some options to allow you to save your image, control the interface, and get information about the Zivid Studio interface being used.
Fig.1.2 Toolbar options with Zivid Studio
Option |
Function |
File |
|
Open | Loads a .ZDF file which is the native Zivid file format. ZDF files include the point cloud, 2D image, basic settings used to capture the point cloud and camera info |
Save |
Saves the point cloud in the chosen file format. Saving as .ZDF will also store the 2D image and the depth image.
|
Export |
Allows you to export the .zdf file as PLY file (*.ply as ordered or unordered)/ ASCII points file (*xyz)/ Point cloud data file (*.pcd)
|
Exit |
Exits Zivid Studio
|
View |
|
Reset 3D View |
Resets the layout of the 3D point cloud
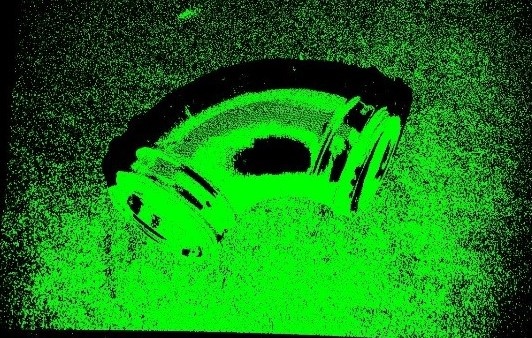
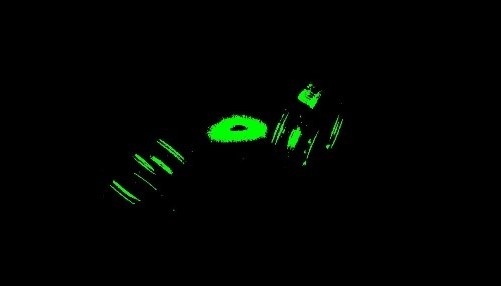
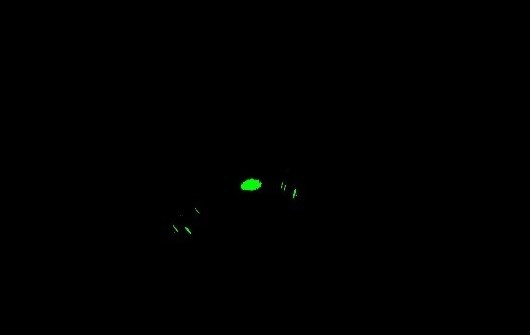
|
Color |
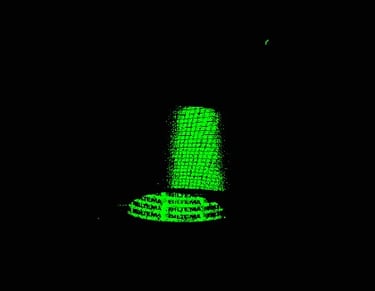
Turns the color on or off. When color is turned off, all acquired pixels in the point cloud are represented in green
|
Mesh |
Creates the appearance of a mesh between all available points in the point cloud.
|
Reset UI layout |
Resets the layout of the Zivid Studio window including the 3D point cloud, 2D image and depth image
|
Enter full screen mode |
Toggles between full and regular screen
|
Help |
|
View help online |
Redirects you to the Zivid knowledge base
|
Legal Notice |
Gives you detailed legal information and third-party software notices
|
Table 1.1 Zivid Studio Toolbar description
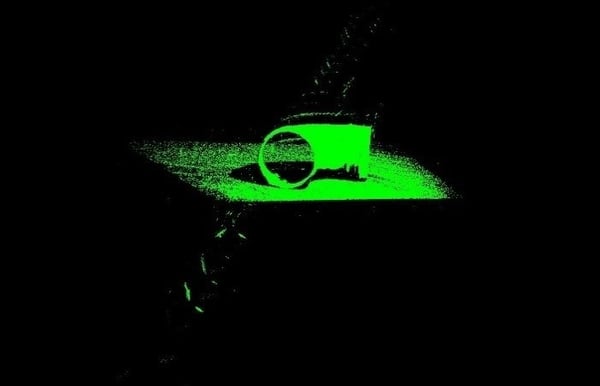
There are three available views to choose from at the bottom of the Zivid Studio interface as shown in Fig. 1.3
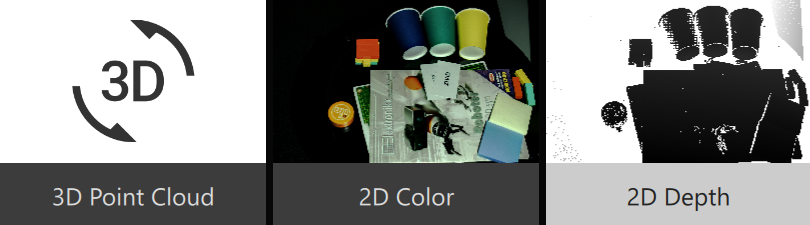
Fig.1.3 Available views
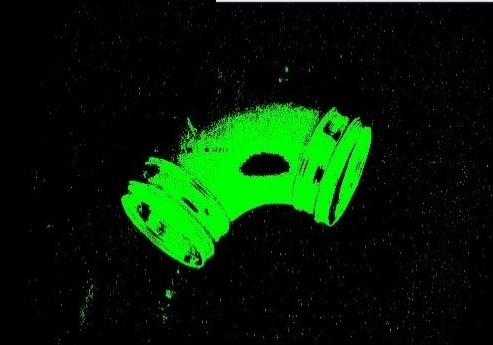
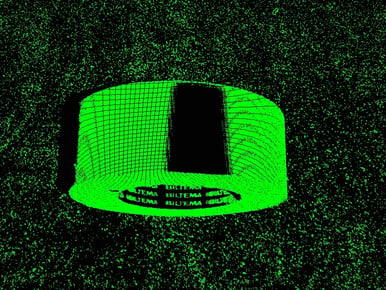
This view displays the 3D point cloud of the scene after capture, or in real time when using the live mode. This is a flexible view with zoom, pan, and rotate functionality. Use the left mouse button to rotate the point cloud and the right mouse button to pan the view. You can zoom in or out by rolling the mouse wheel, or by the middle mouse button (if available) followed by dragging the mouse.
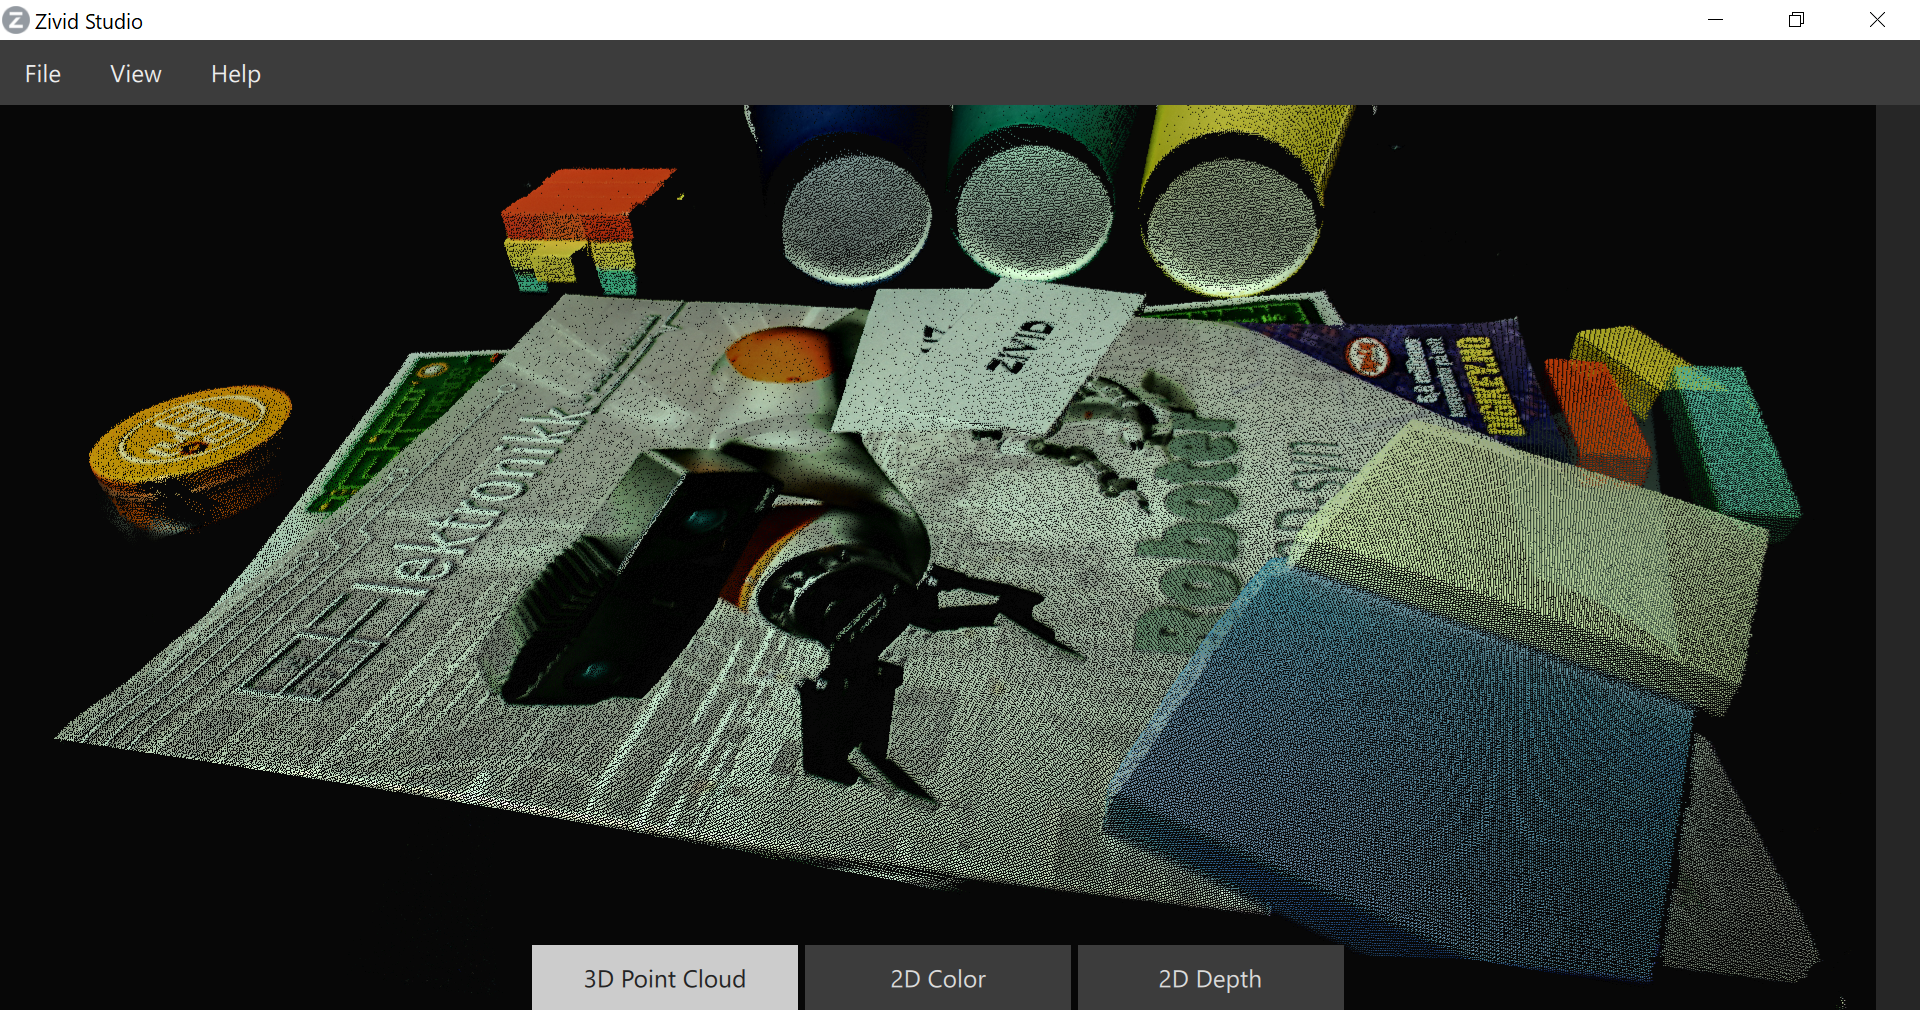
Fig.1.4 3D point cloud
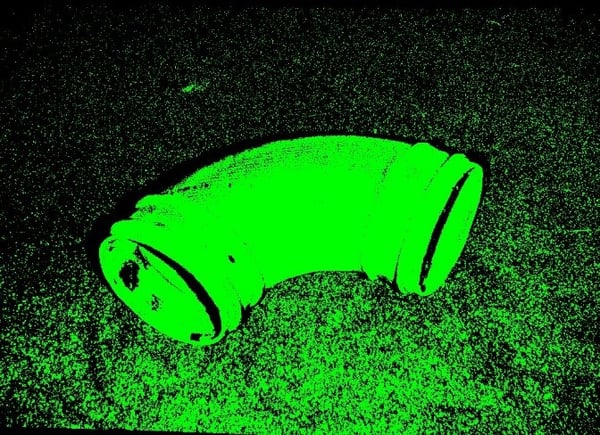
You can view the 2D image by choosing the 2D color tab at the bottom. Zoom and pan functionality is available, however rotate function is not available with this view.
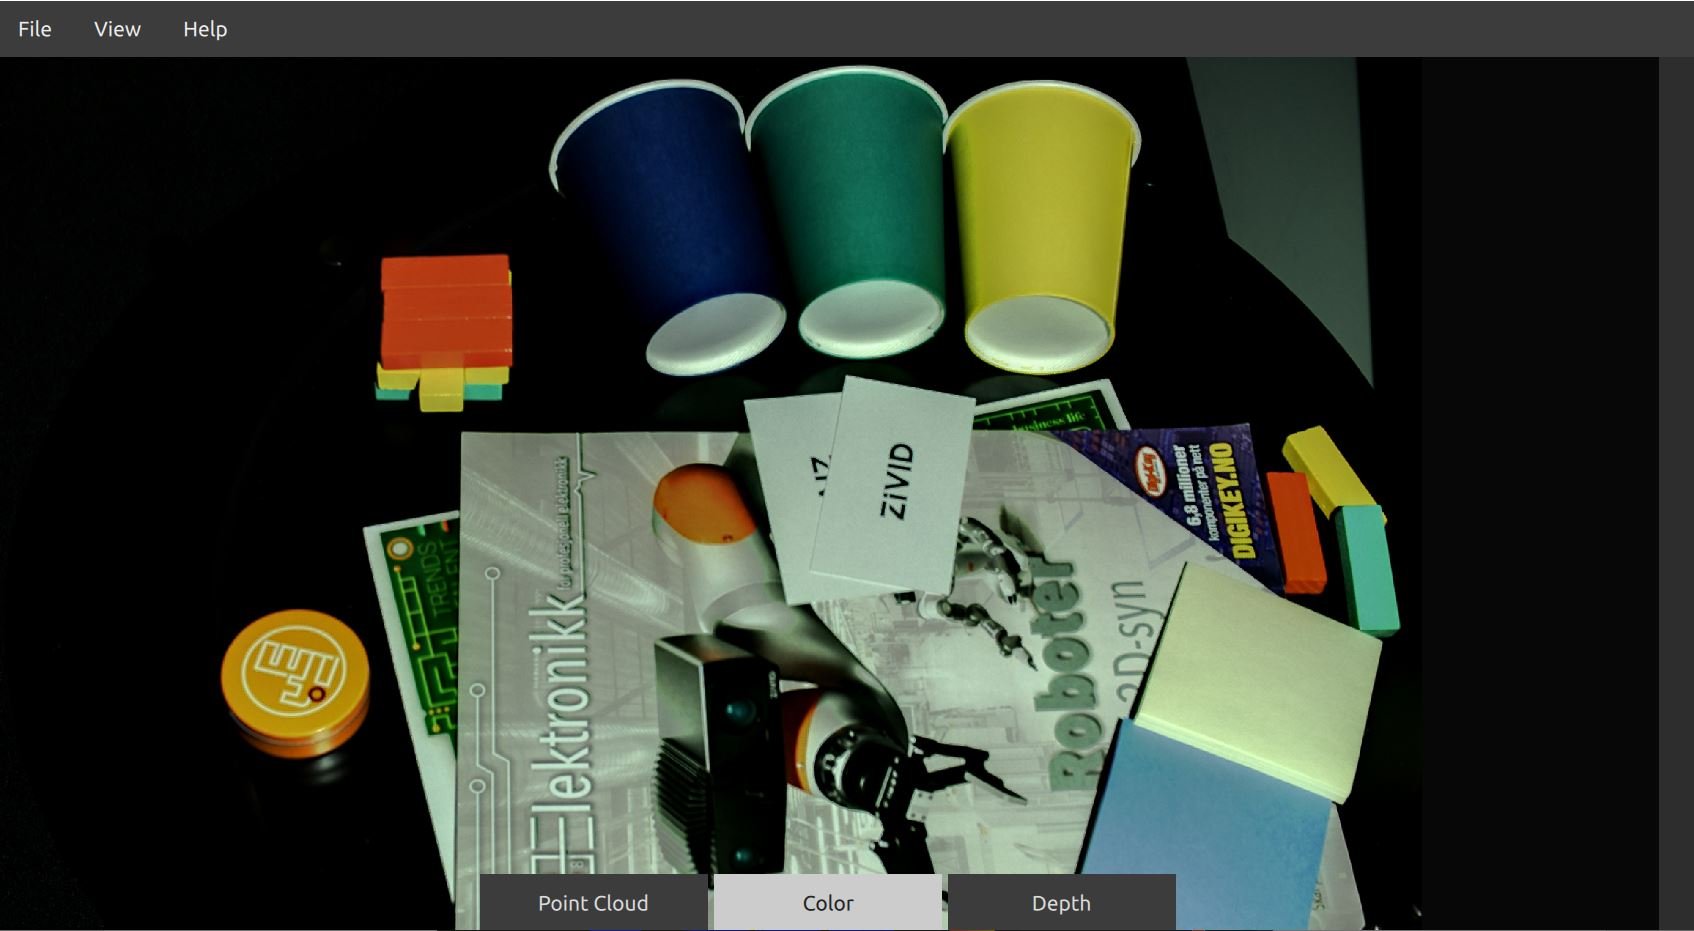
Fig.1.5 2D color image
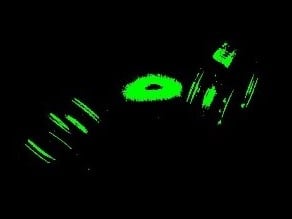
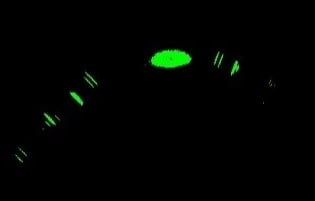
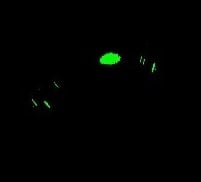
This view displays the depth image of the imaged objects. The color scale shows the variation in distance along the z-axis from the camera to the surfaces of the imaged objects.
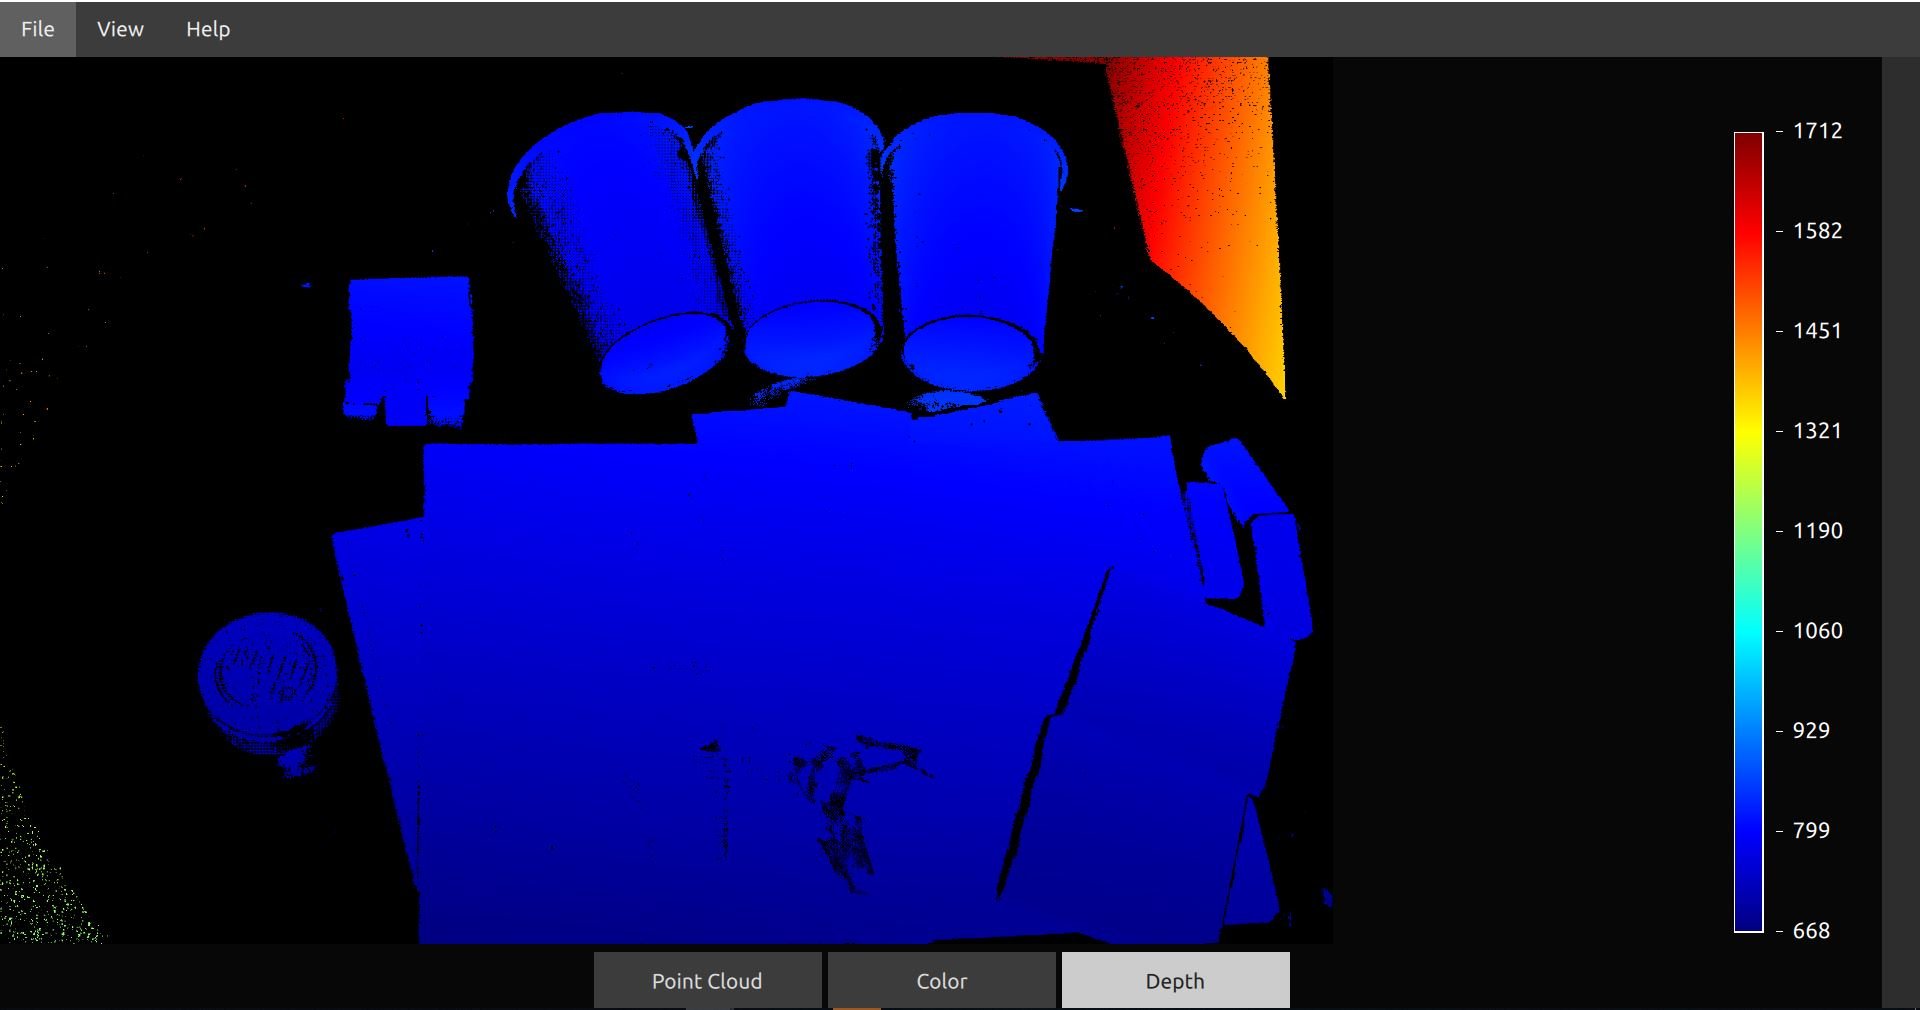
Fig.1.6 2D depth image
Step 1. Enter live mode
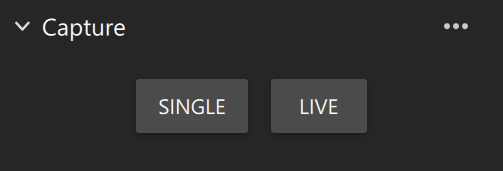
Fig.1.7 Enter live mode
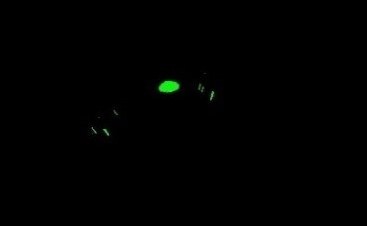
Step 2. Determine optimal settings to acquire dense points over the entire scene.
The camera has an active iris that controls the amount of light that gets into the camera. The iris can have values from 0-72 where a higher value lets more light in. The iris is open enough to capture objects from a scene at around iris value 8-10. As you keep on increasing the iris you will continue to acquire more and more points on your object until a certain iris value. Beyond this iris value, you will start losing points on your object. A sample graph for a white object is shown below.
Fig.1.8 Number of pixels acquired and iris value for a white sample object
The Zivid camera can capture high quality images for many objects with a single iris. However, depending on the objects being imaged, you may need more than one iris value to get points on the whole scene.
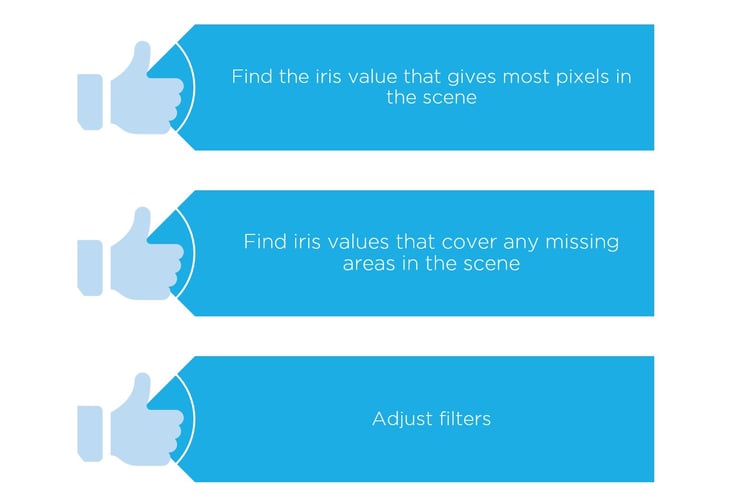
Fig.1.9 Choosing optimal settings
Do not choose iris values randomly or in increments. This reduces data quality. Ensure that you adjust the iris slider in live mode to find the iris(es) that render points over the whole scene. If multiple irises are required, click add frame
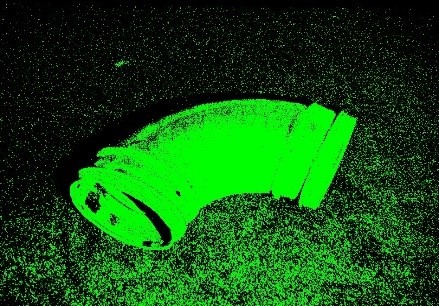
Step 3. Click Single/HDR to view the resulting point cloud
There are several unique filters and settings available in Zivid Studio to ensure that you get a high-quality point cloud. The basic settings to adjust in order to capture a good 3D image are iris, exposure time and brightness.
Fig.1.10 Basic settings in Zivid Studio
To ensure that images retain depth of field, set the iris values below 40 and increase the exposure time instead to compensate for loss of light.
Finding the best combination of iris and exposure time settings
You can increase the amount of light entering the camera by
In Fig 1.7, different combinations of iris and exposure time settings are used to capture four good images with dense points. However, Image 4 with the highest exposure time and the lowest iris retains the most depth of focus and has the sharpest point cloud.
Increasing the exposure time will require you to decrease the iris for similar results
Decreasing the exposure time will require you to increase the iris for similar results
Multi frame HDR:
All the settings available within Zivid Studio are clustered into frames. For each frame specified, the camera captures an image with all the associated settings (iris, exposure time, brightness etc.) for that frame. The images corresponding to each frame are finally combined to display a single high-quality HDR output image. Refer image 1.9 for illustration.
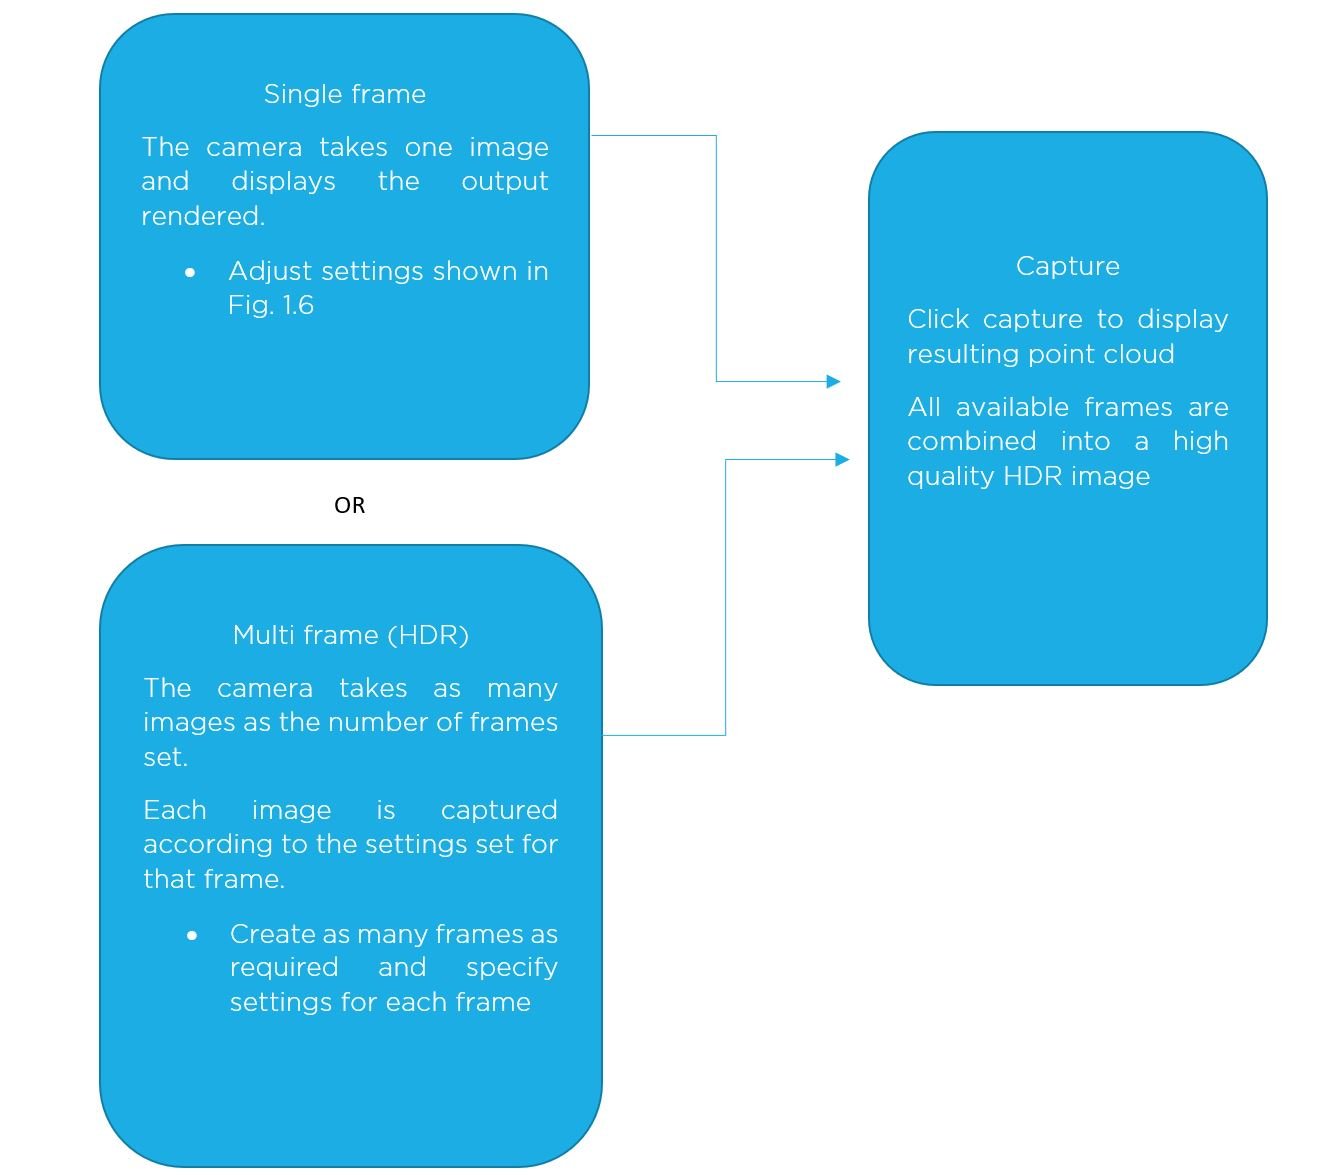
Fig.1.11 Single capture or multi frame HDR capture
Fig. 2.1 Options on the capture dialog
Fig. 2.2 Zivid Studio Functions
The electronic iris is an adjustable opening (aperture), which controls the amount of light coming through the lens (i.e. the "exposure"). The more you open the iris, the more light comes in and the picture appears brighter. The iris can have values from 0 to 72 where higher values lets more light in. The iris is open enough to capture objects from a scene at around iris value range of 8-10. As you keep on increasing the iris you will continue to acquire more and more points on your object until a certain iris value. Beyond this iris value, you will start losing points on your object (Fig 1.8).
Reducing the aperture diameter (increasing the f-number) increases the depth of field because only the light travelling at shallower angles passes through the aperture.
To help you understand how to take optimal images with your new 3D camera, we have compiled a few case scenarios with different types of materials.
SAMPLE | ZIVID ONE+ 3D CAMERA |
MATERIAL | BLACK ANODIZED ALUMINIUM AND PLASTIC |
MODE | MULTI FRAME |
ESTIMATED TIME REQUIRED | 4 MINUTES |
AMBIENT LIGHTING | LOW |
STEPS |
5 |
Fig.3.1.1 Zivid camera in 2D
Step 1: Enter live mode
Step 2: Adjust the iris slider to find the settings that gives you maximum number of points in the point cloud.
Step 3. Adjust the exposure time if necessary
Step 4: If multiple irises are required, click add frame to introduce new iris(es). You can adjust the exposure time and other settings for every frame as required
Step 5: Click capture to view the resulting point cloud from all the defined frames. Turn color off (keyboard shortcut ‘c’) to ensure that you have points all over the black object or change settings if required.
For this case with the Zivid camera, the combination of iris values 15 and 36 along with the exposure time of 10000 produces a good point cloud. Fig.3.1.2 and 3.1.3. illustrate the need for multi-frame capture. Fig. 3.1.3 has dense points over most of the object, but some areas, e.g. around the edges and the Zivid logo do not have points unless you include iris 15.
Fig.3.1.2 Single capture with Iris 15
Fig.3.1.3 Single capture with Iris 36
Fig.3.1.4 High quality point cloud using HDR mode with Iris 15 and 36
For this case with the Zivid camera, the combination of iris values 15 and 36 along with the exposure time of 10000 produces a good point cloud. Fig.3.1.2 and 3.1.3. illustrate the need for multi-frame capture. Fig. 3.1.3 has dense points over most of the object, but some areas, e.g. around the edges and the Zivid logo do not have points unless you include iris 15.
Fig. 3.1.5 Optimizing settings for your application
SAMPLE | MEFFERT'S CUBE |
MATERIAL | COLORED PLASTIC |
MODE | MULTI FRAME |
ESTIMATED TIME REQUIRED | 2 MINUTES |
AMBIENT LIGHTING | MEDIUM |
STEPS |
4 |
Fig.3.2.1 Image of a Meffert's cube in 2D
Step 1: Enter live mode
Step 2: Adjust the iris slider to find the settings that gives you maximum number of points in the point cloud
Step 3. Adjust the exposure time if necessary
For the Mefferts cube, it was not necessary to change the exposure time
Step 4: If multiple irises are required, click add frame to introduce new iris(es). You can also adjust the exposure time and other settings for every frame as required
Step 5: Click capture to view the resulting point cloud from all the defined frames. Turn color off (keyboard shortcut ‘c’) to ensure that you have points all over the black object or change settings if required
Iris 21
Iris 30
Fig.3.2.2 Point cloud with Iris setting 21 and 30
Using 2 frames with irises 21 and 30 renders a high quality HDR image and a dense point cloud with no missing areas as shown in Fig.3.2.3
Fig.3.2.3 High quality point cloud using HDR mode with iris 21 and 30
SAMPLE | METAL PIPE |
MATERIAL | SHINY METAL |
MODE | MULTI FRAME |
ESTIMATED TIME REQUIRED | 7 MINUTES |
AMBIENT LIGHTING | LOW |
STEPS |
5 |
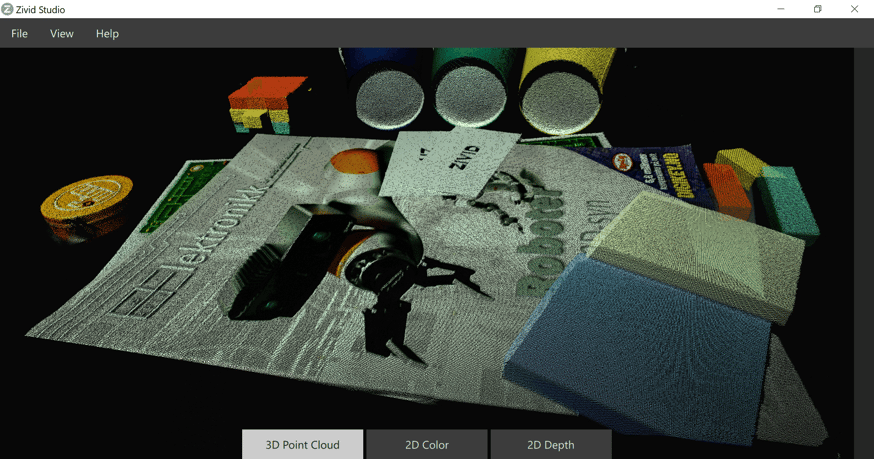
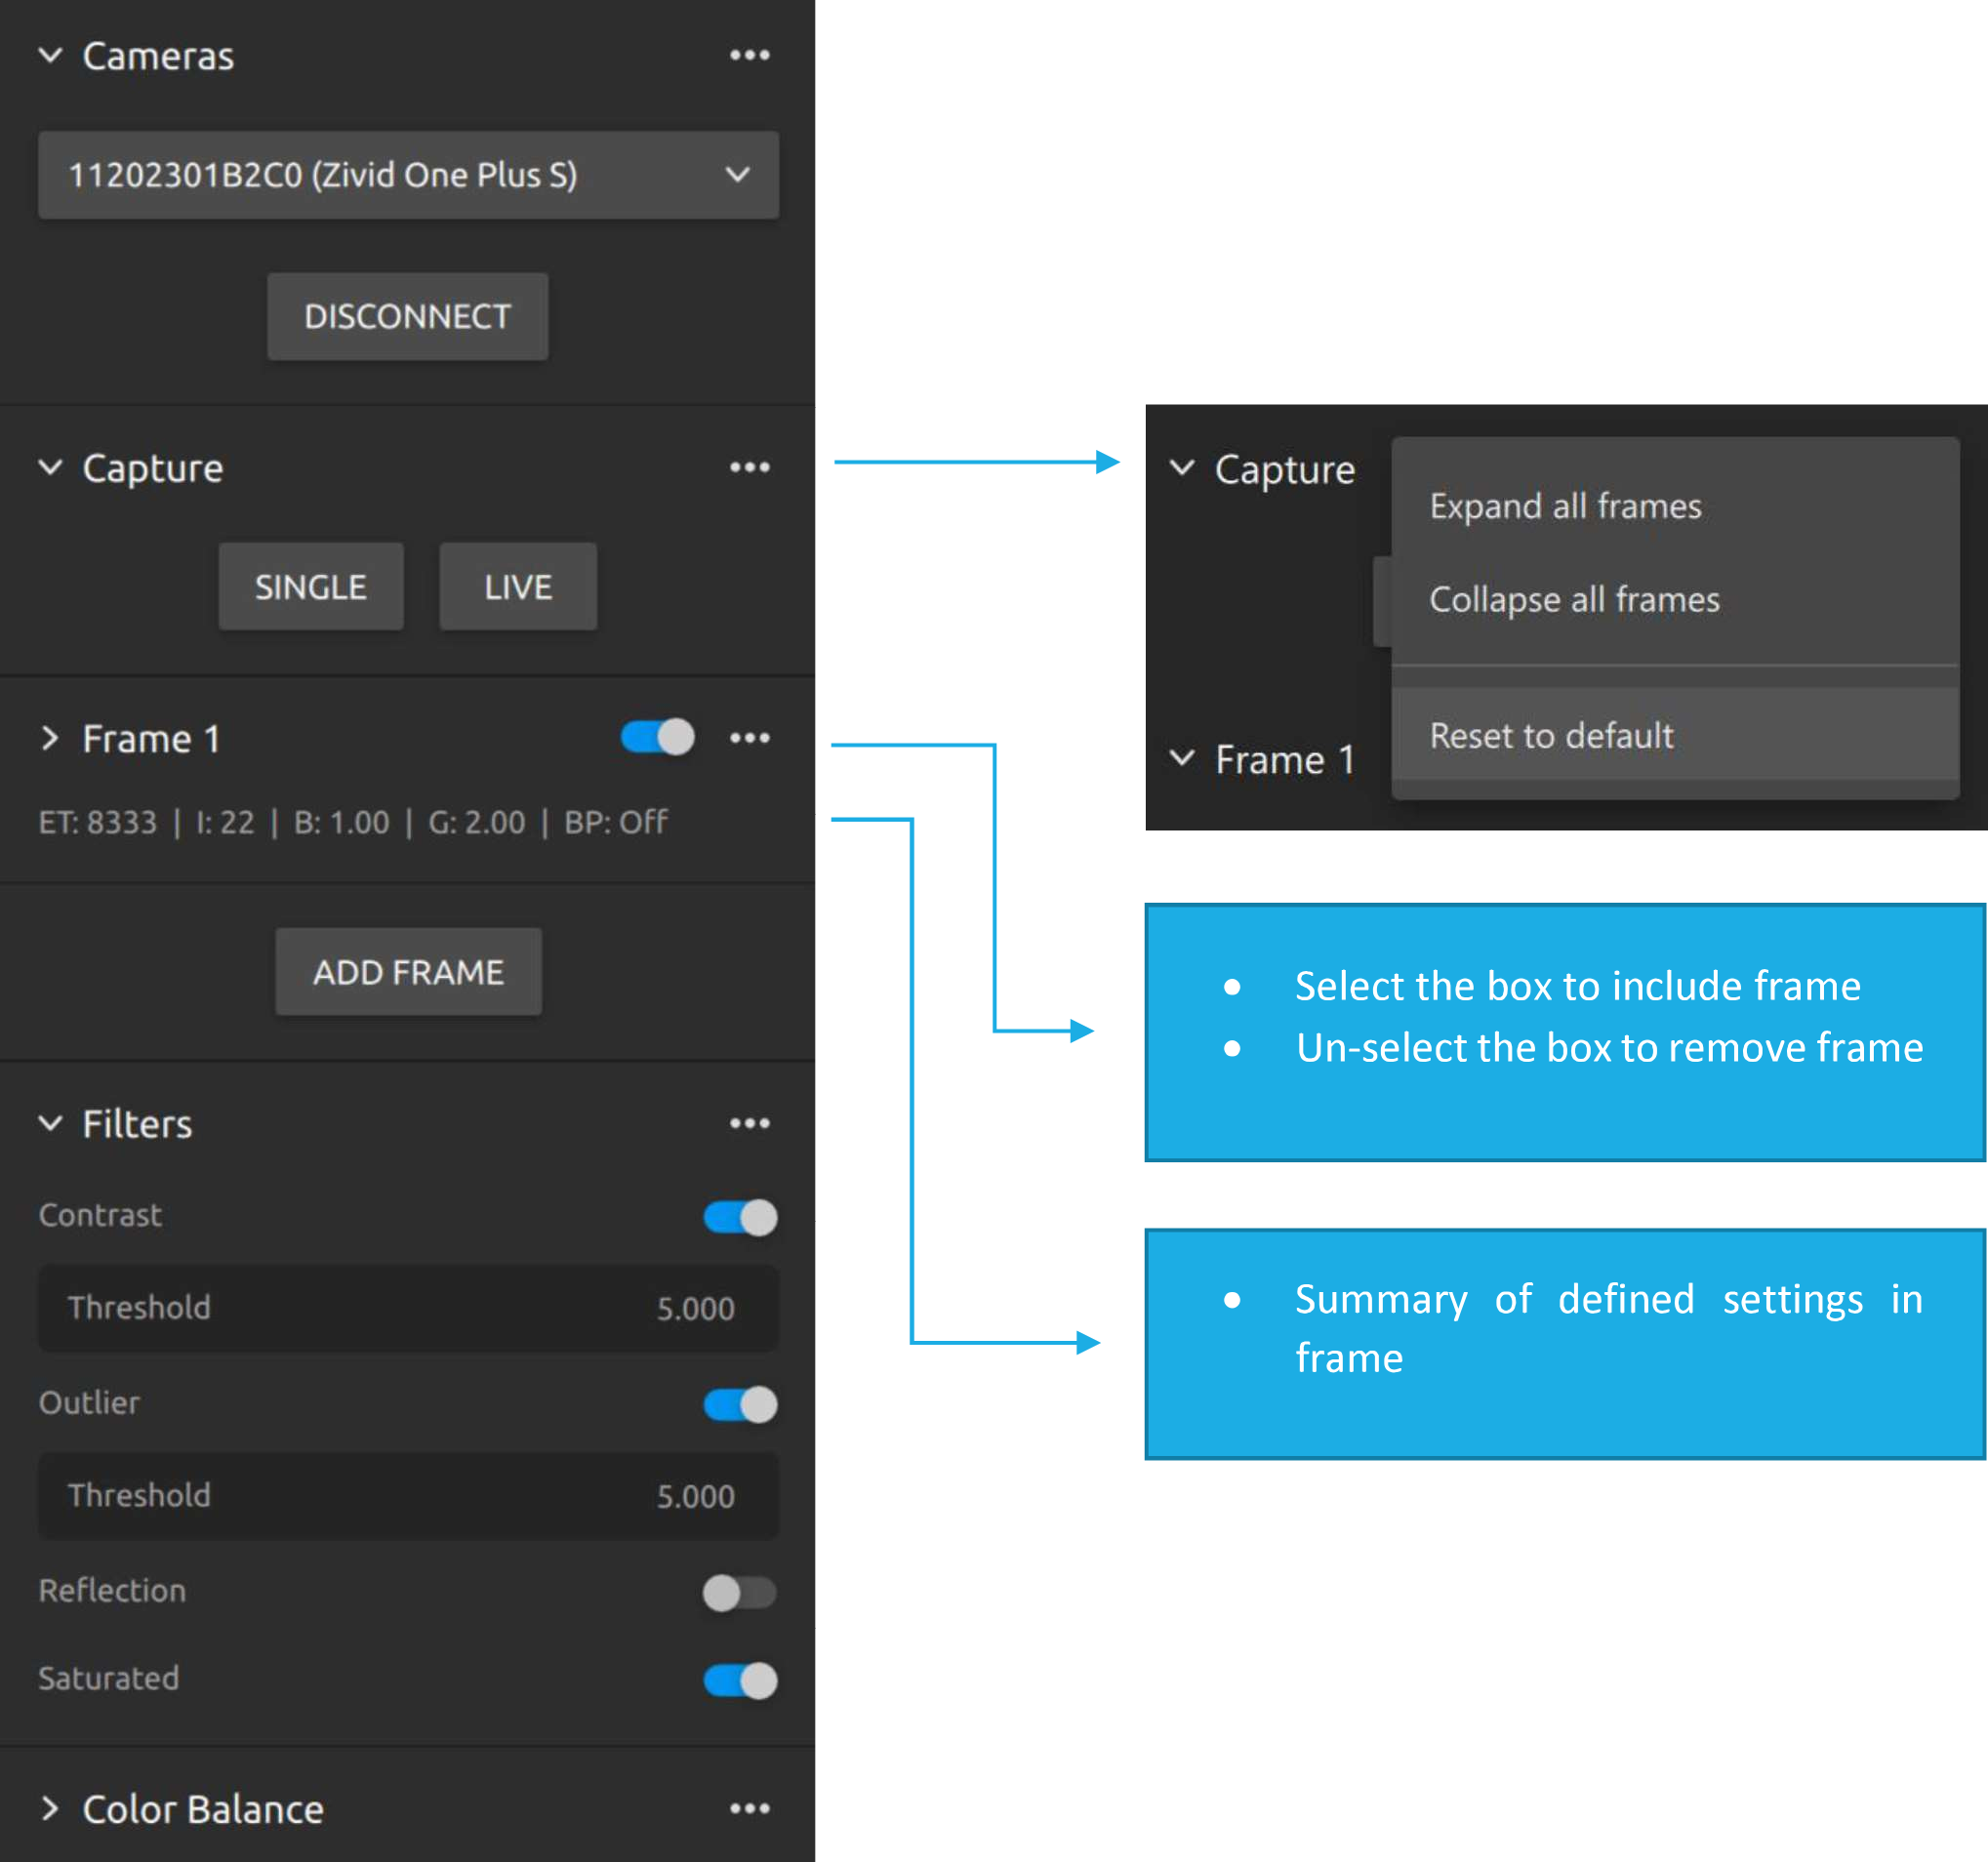
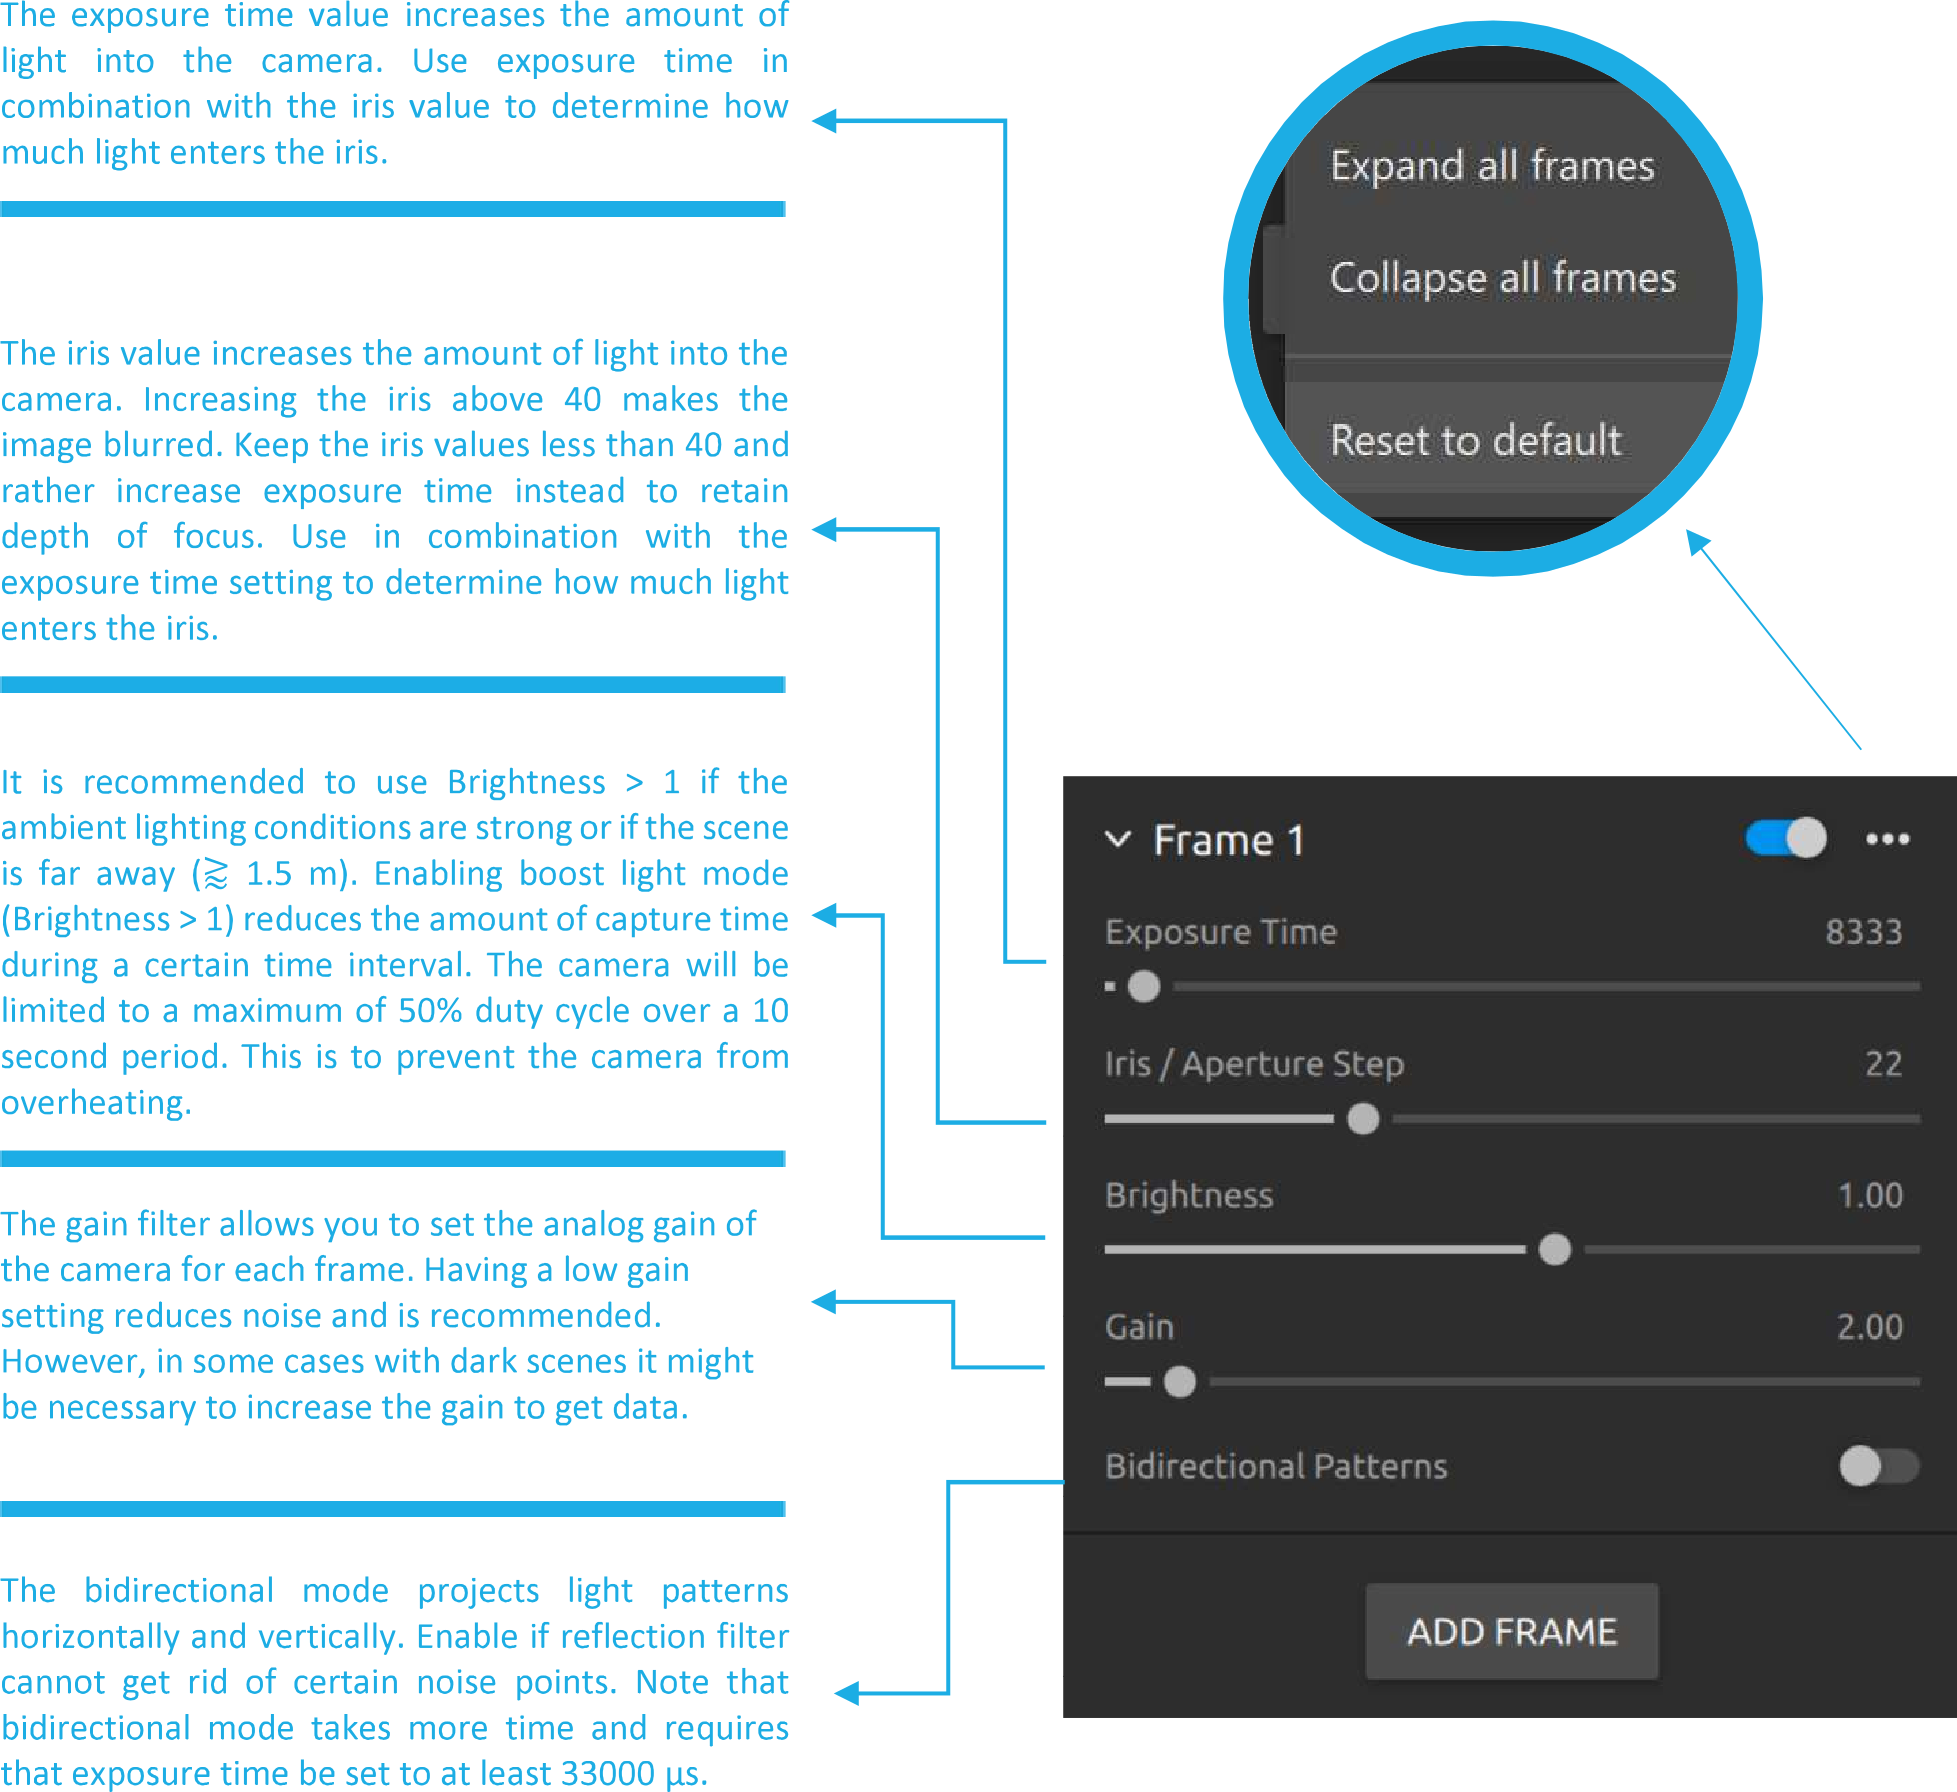
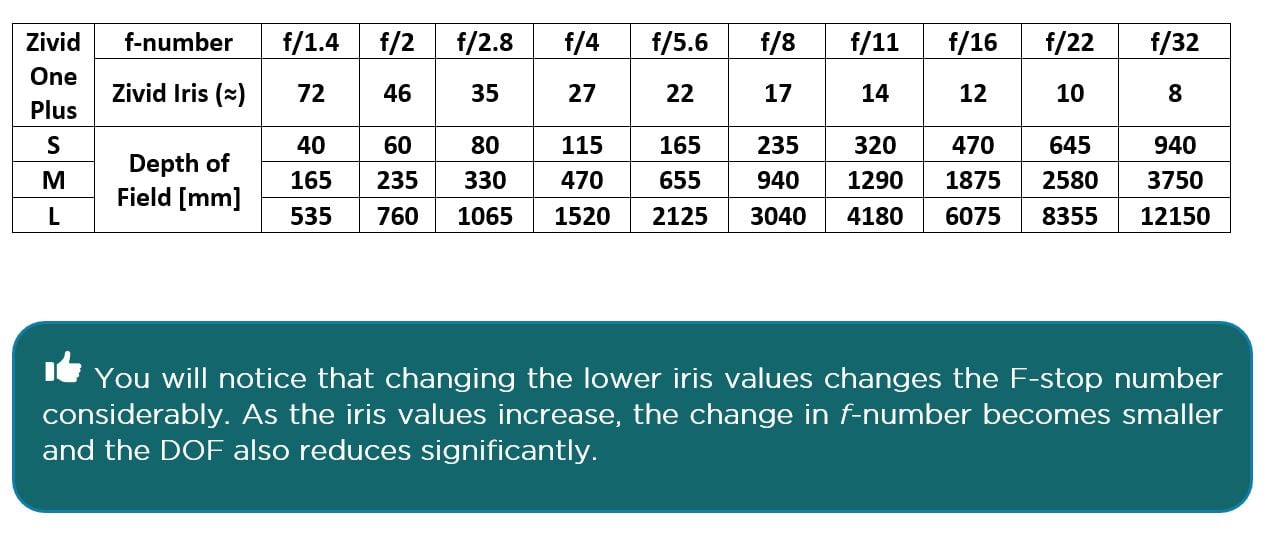
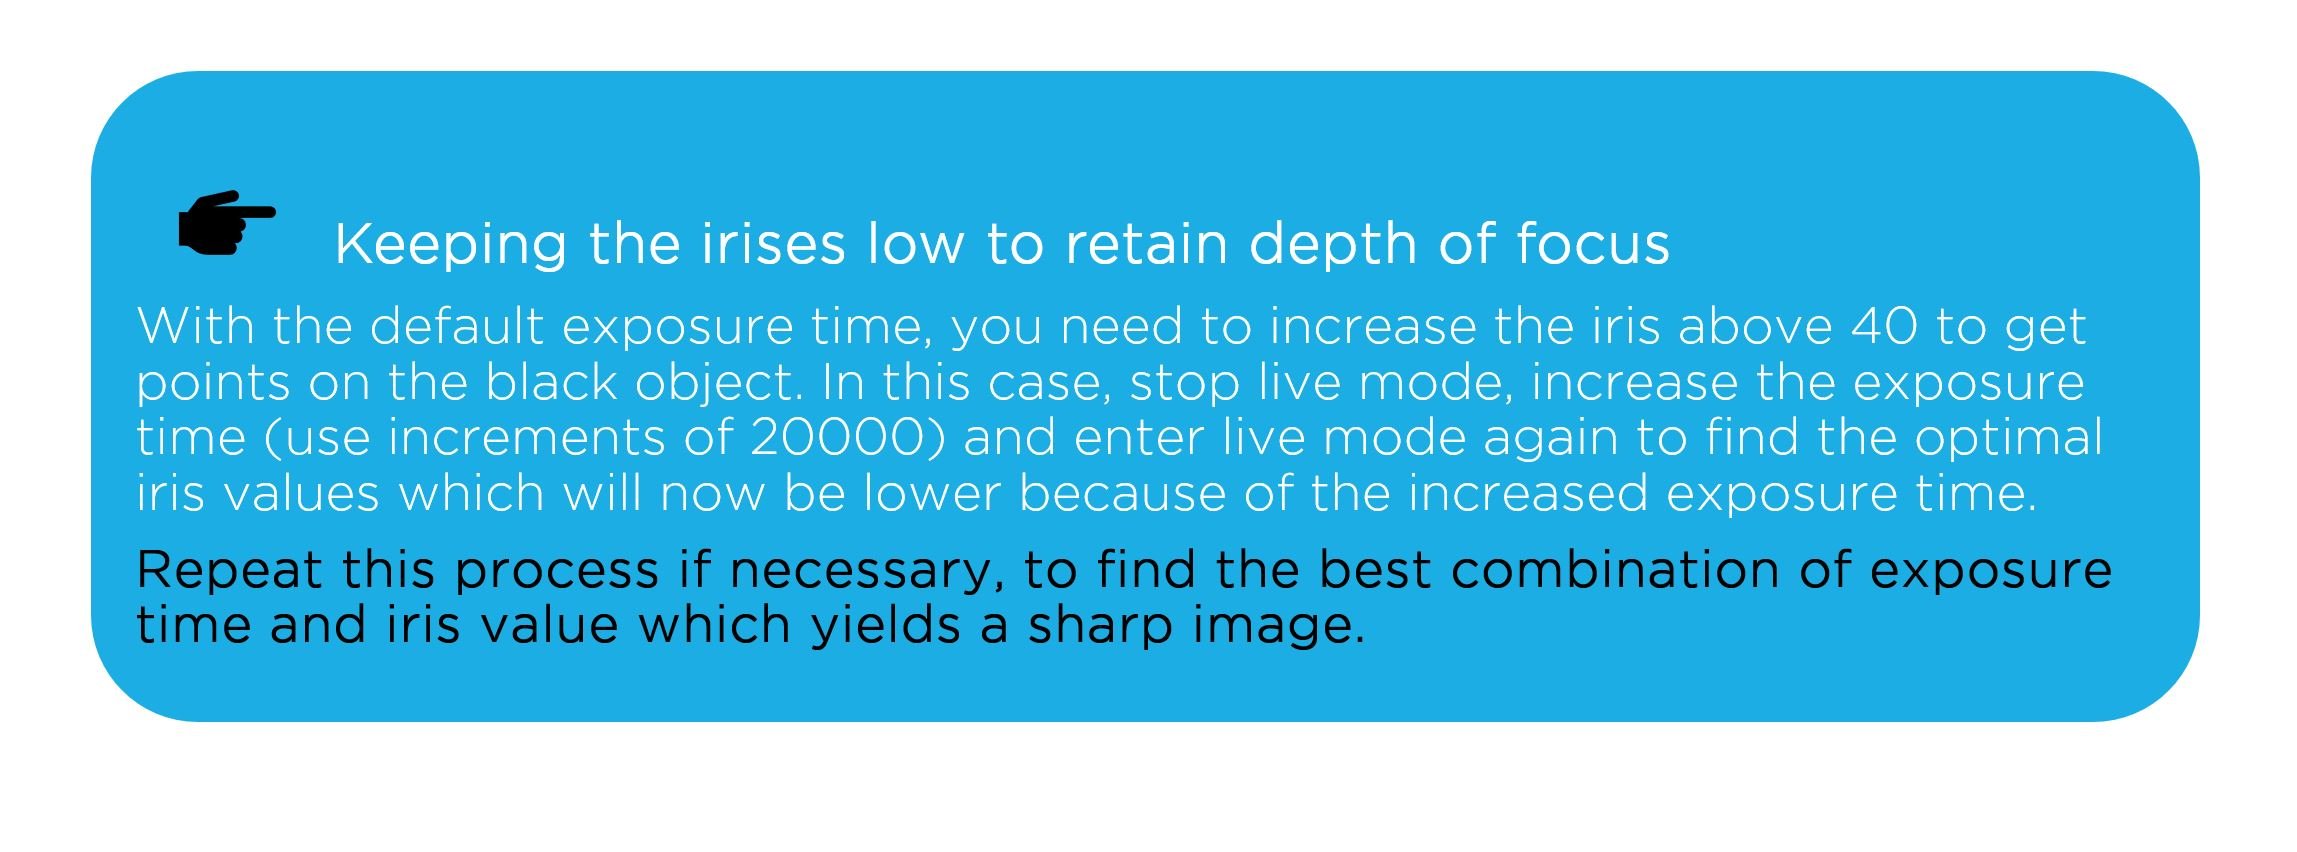
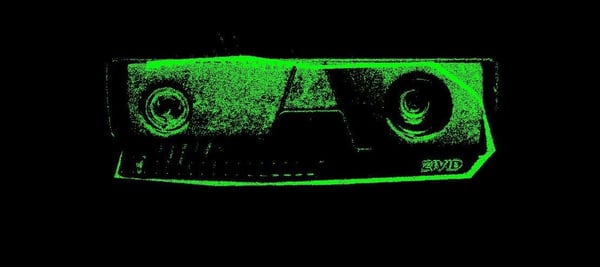
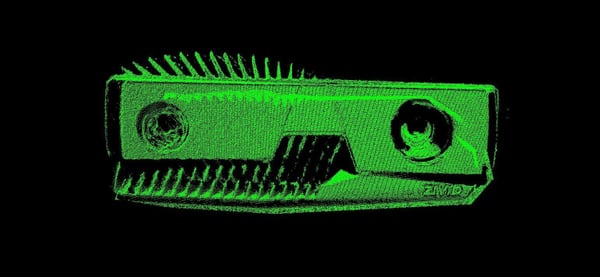
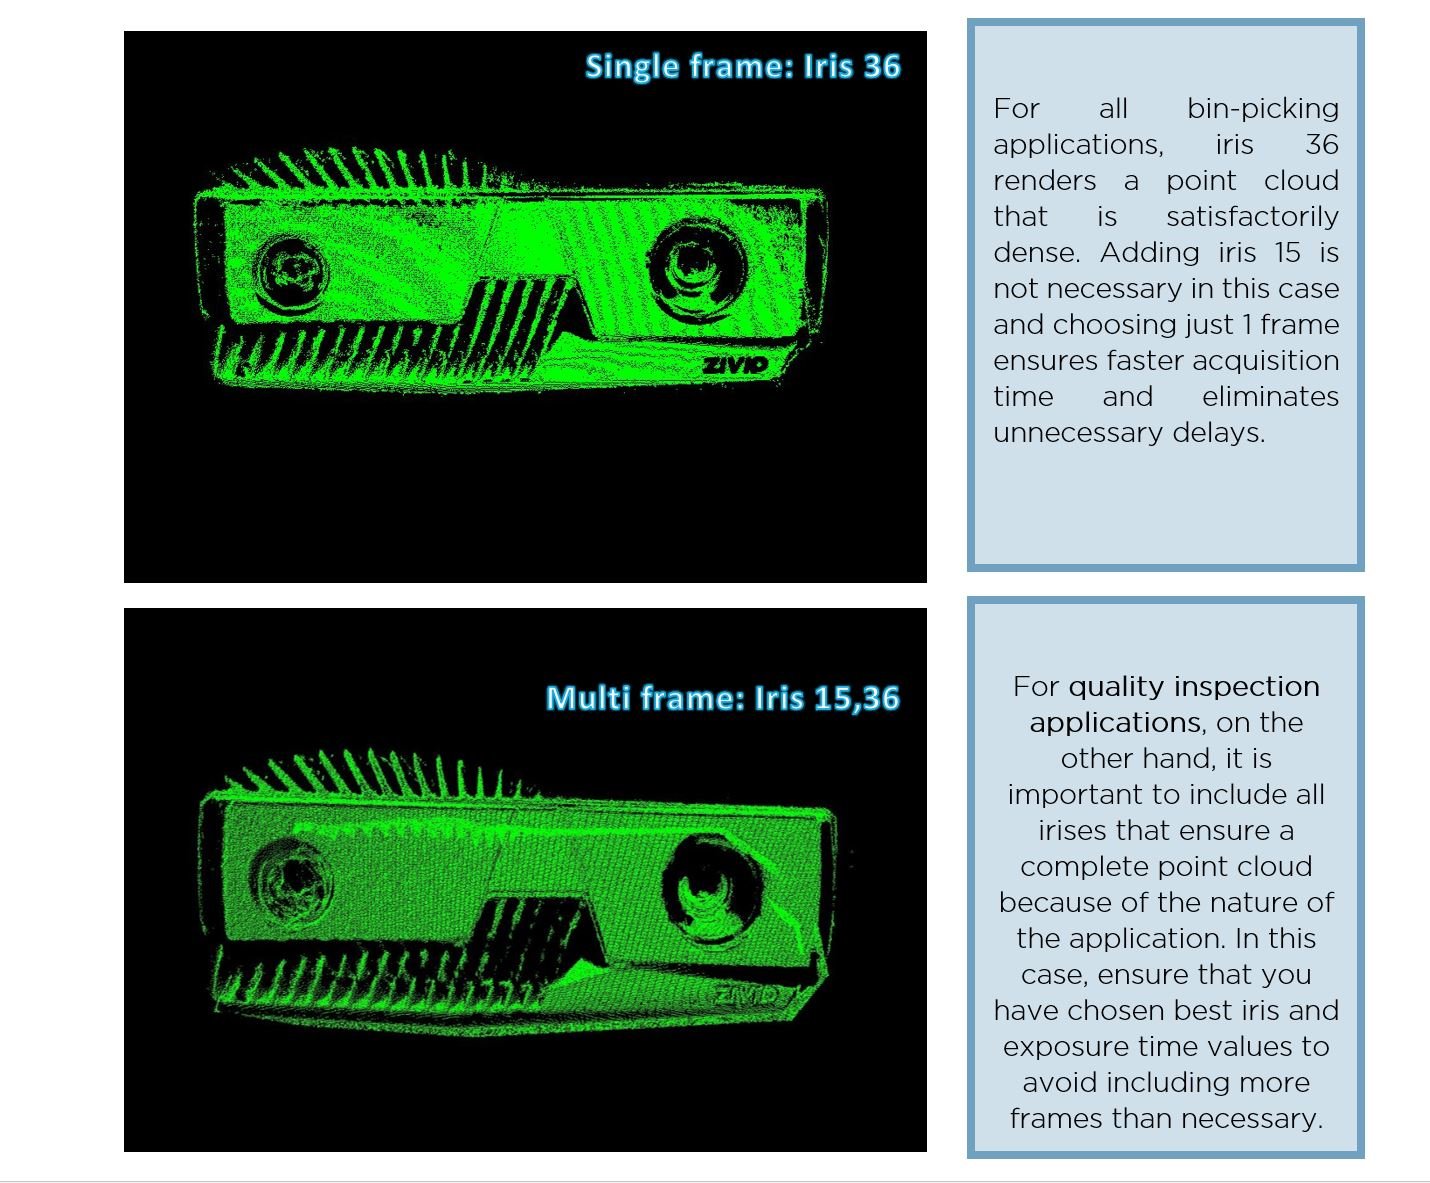
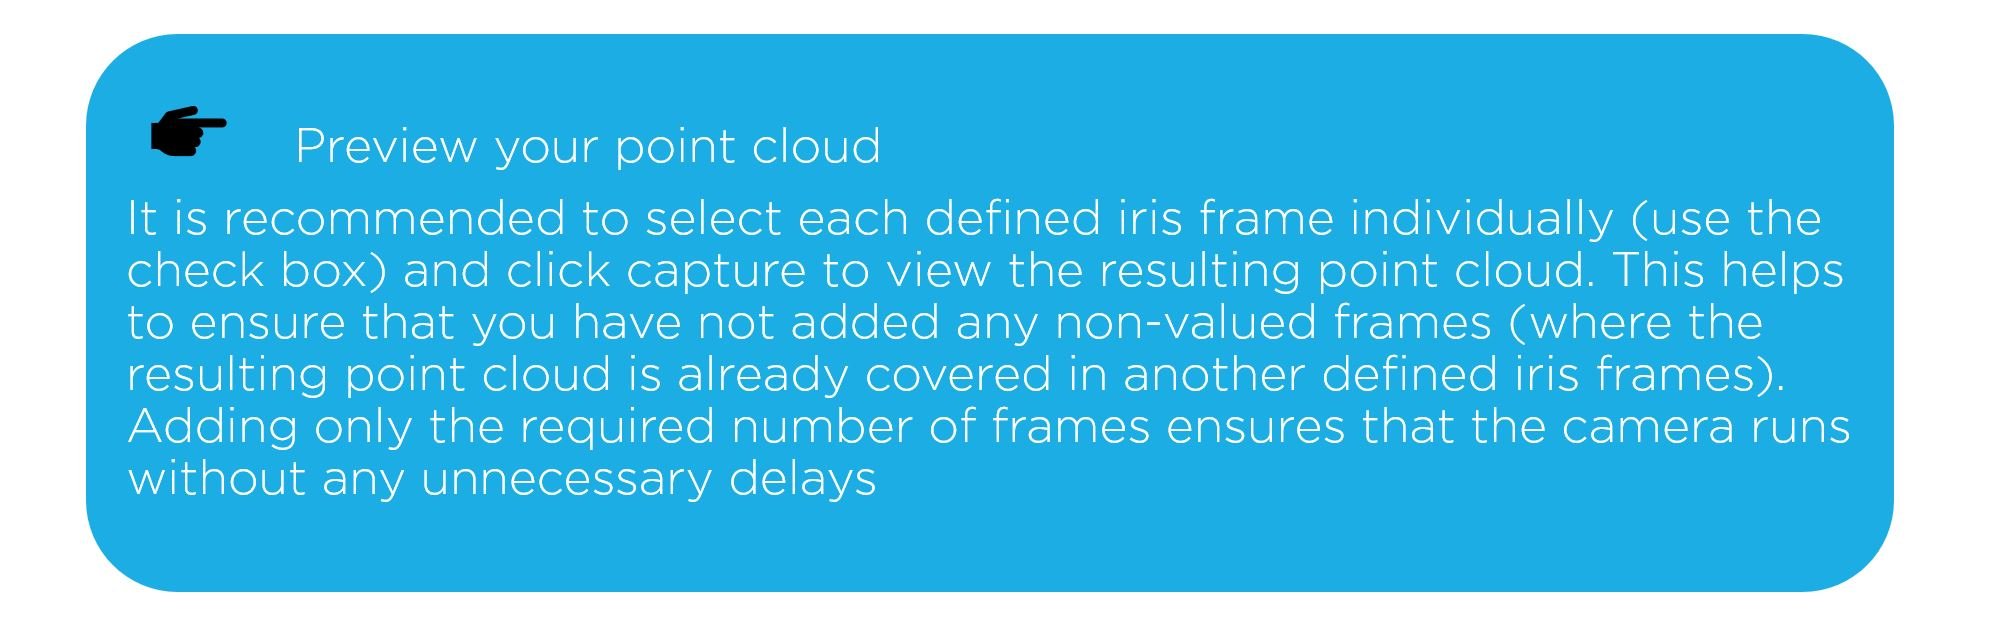
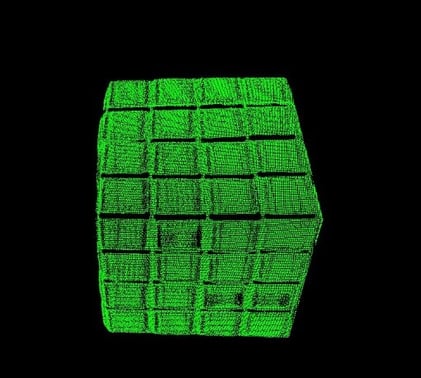
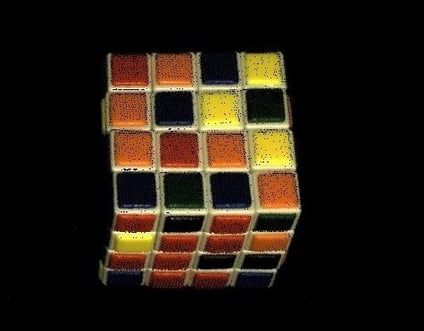
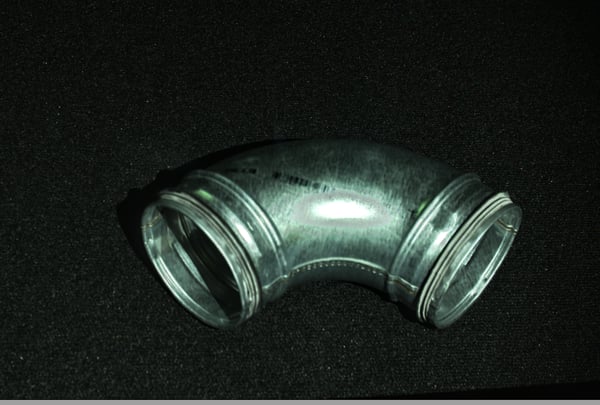
Fig.3.3.1 Image of the object in 2D
Step 1: Enter live mode
Step 2: Adjust the iris slider to find the settings that gives you maximum number of points in the point cloud
Step 3. Adjust the exposure time if necessary
Step 4: If multiple irises are required, click add frame to introduce new iris(es). You can adjust the exposure time and other settings for every frame as required
Step 5: Click Capture to view the resulting point cloud from all the defined frames. Turn color off (keyboard shortcut ‘c’) to ensure that you have points all over the black object or change settings if required
Iris 37 |
Iris 29 | Iris 20 |
Iris 14 | Iris 10 | HDR |
Fig.3.3.2 Capturing HDR image of a shiny object
For this object, five iris values are required- 10, 14, 20, 29 and 37. Each of these active iris points were tested individually and confirmed to be the best combination of settings required for this object.
Fig.3.3.2 illustrates the result of these different iris values individually, and the final output with the use of Zivids unique HDR feature.
Iris 14 | Iris 11 | Iris 10 |
Fig.3.3.3 Capturing HDR image of a shiny object
Expert tip: On rotating the 3D image you may find noise points. These points can be chaotic if recognized as part of the object (e.g. In case of a bin-picking scenario). Zivid’s unique reflection filter solves this problem intelligently. Under Preferences, enable the reflection filter to eliminate noise points and get a noise free image.
Without Reflection Filter | With Reflection filter |
Fig.3.3.4 Effect of Zivid's unique reflection filter
These tips should help you capture an optimal image with a dense point cloud. Fig.3.3.5 displays the final output of the object used in this example.
HDR without color | HDR with color |
Fig.3.3.5 Final HDR image in 3D
Example: For the shiny metal pipe, adding iris 11 when iris 10 and 14 are already set do not optimize the image further as the points rendered by iris 11 are already included in the points given by iris 10 and 14.
E.g. Use brightness less than 1.0 in dark conditions, and higher than 1.0 in bright conditions.
Example: 0.5m for the Small, 0.8 m for the Medium, and 1.8 m for the Large cameras.
E.g. Black bin/ black background.
E.g. As shown in Fig.3.3.6, the highlight in the middle of the duct tape is countered by adding a lower iris of 13.
Fig. 4.3 Countering highlights with low irises
Colour | c |
Toggle full screen | F11 |
Reset 3D view | backspace |
Capture | F5 |
Live | Shift+F5 |
Stop Live | Esc |
Save | Ctrl+s |
Open | Ctrl+o |
Quit | Alt+F4 |
Here are some initial troubleshooting steps that will help you resolve any problem you face during set up. Should you encounter any difficulties, email us at customersuccess@zivid.com. Also check out our FAQ page and knowledge base at zivid.atlassian.net
1. Zivid Studio set up
If you are unable to launch Zivid Studio after an installation, please try the following steps (please note that the following steps are described for Windows 10, but similar approach should be done in Linux):
If you are still facing problems, please contact the Zivid team at customersuccess@zivid.com.
2. Connecting to a Zivid camera with Zivid Studio
If you are unable to find or connect to the Zivid camera in studio, please try the following steps (please note that the following steps are described for Windows 10, but similar approach should be done in Linux):
3. Error messages in Zivid Studio
ERROR |
RESOLUTION |
No Camera found
|
|
Failed to check if block 0 in the EEPROM master table is occupied OR Inconsistent frame timing detected, which would result in a broken point cloud
|
Ensure that the Zivid camera is not used by any other applications such as Cloud viewer, Zivid Studio, or Visual Studio. Also ensure that multiple tabs of the same application are not open. |
Disconnection or freezing application
|
Ensure that the power and data cable are screwed in tightly into their slots. Loose cables will result in frequent loss of connection |
4. Ambient lighting effects
Zivid cameras use projected light to determine the distance to objects in the scene. Ambient light introduce noise that affect the accuracy of the 3D sensors, and in worst case may cause data loss. The table below explains some effects of ambient light and how to deal with them.
Symptoms | Cause | Possible solution |
The 3D point cloud is changing over time with the same scene as if the settings used are no longer giving the same results as they did before. |
Changing light conditions such as automatically enabled or dimmed lights or sunlight entering through windows |
|
I’m seeing waves or ripple-like effects on planes in the point cloud. |
This could be caused by the power line frequency mixing into the sensor signal. | Use an Exposure Time equivalent to texp=n2×fline, where n is an integer and fline is the power line frequency. In e.g. EU this is 50Hz, and in US this is 60Hz. For Europe, exposure times in multiples of 10’000 µs should be used, and multiples of 8’300 µs in the US. |
The 2D color image has very bright spots, or there could be spots of missing data in the 3D point cloud. |
Direct reflex from light sources may over saturate the sensor. |
|
Your Zivid camera is the world’s most accurate, real time 3D color camera because it has been developed and put together with much thought from your friends at Zivid to ensure that you have a fantastic 3D experience! So, what makes Zivid tick?
Here is a little background to help you know your camera better.
The Zivid camera functions on the principle of structured light. Zivid contains a projector and a camera that is placed at a specific angle to and distance from each other. Light patterns are projected by the projector onto the object and the displacement in the light patterns are used to calculate the depth of the object at every point giving you a 3D model of your object. For every image capture performed by Zivid, several images are captured internally by the camera at a remarkable acquisition rate of 10 Hz to ensure that the captured point cloud gives the most accurate data.
Fig. 5.1 Calculating depth with structured light
Fig.5.2 Projection of striped light patterns
One of Zivid’s most unique features is the HDR capability. ‘Difficult’ objects are made easy with this feature. The HDR mode allows you to choose different iris settings which are best suited for the different colors or areas of your object. The camera captures images internally with each of these specified iris settings and these images are then combined to give you the best possible output with overall accuracy.
Some other features that make Zivid special are the filters that give you added functionality. The Reflection filter for example ensures that you can take images of shiny objects without false, noise points. Consider a picking scenario where the camera mistook false points (points in the point cloud corresponding to reflections) as part of the object. A robot attempting to perform a pick could aim at these false points instead, resulting in an erroneous and chaotic process!
Zivid also functions in the full color spectrum which renders a high quality, 3D point cloud with life-like resemblance.
Visit the Zivid One or Zivid One+ product pages for complete specs.
For more information about the Zivid cameras, visit www.zivid.com
For software related information, visit www.zivid.com/software
For sample code, visit www.github.com/zivid
For resource articles and the knowledge base, visit help.zivid.com
For assistance, please email customersuccess@zivid.com
Zivid brings
Gjerdrums
N-0484, Oslo
Norway